Alexa, tell Stackery to deploy

We have a couple of Amazon Dots around the office and one day, Nate was wondering if we could use Alexa to deploy a stack. That sounded like a fun side project, although I'd never created an Alexa skill before. So this week, I'm going to write a bit about the proof-of-concept I made, and some of the learnings I came across.
To learn about Alexa skills, I used two guides:
- Steps to Build a Custom Skill to guide me through building the custom Alexa Skill
- Developing Your First Skill to understand how custom Skill Handlers are written in NodeJS
Creating the Alexa Skill
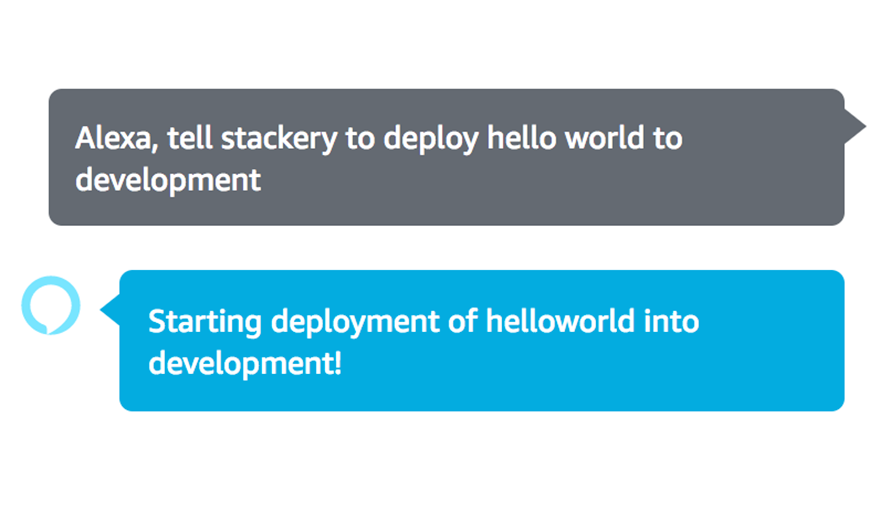
Designing and building the Alexa Skill following the first guide was surprisingly straight-forward. I decided I wanted to build my skill to enable deploying a stack into a specific environment. For the purpose of this POC, I decided that adding which branch to use for the deployment to start getting to be too long of an utterance/dialog. My ideal phrasing was to be able to say "Alexa, tell stackery to deploy $STACK_NAME into $ENVIRONMENT_NAME".
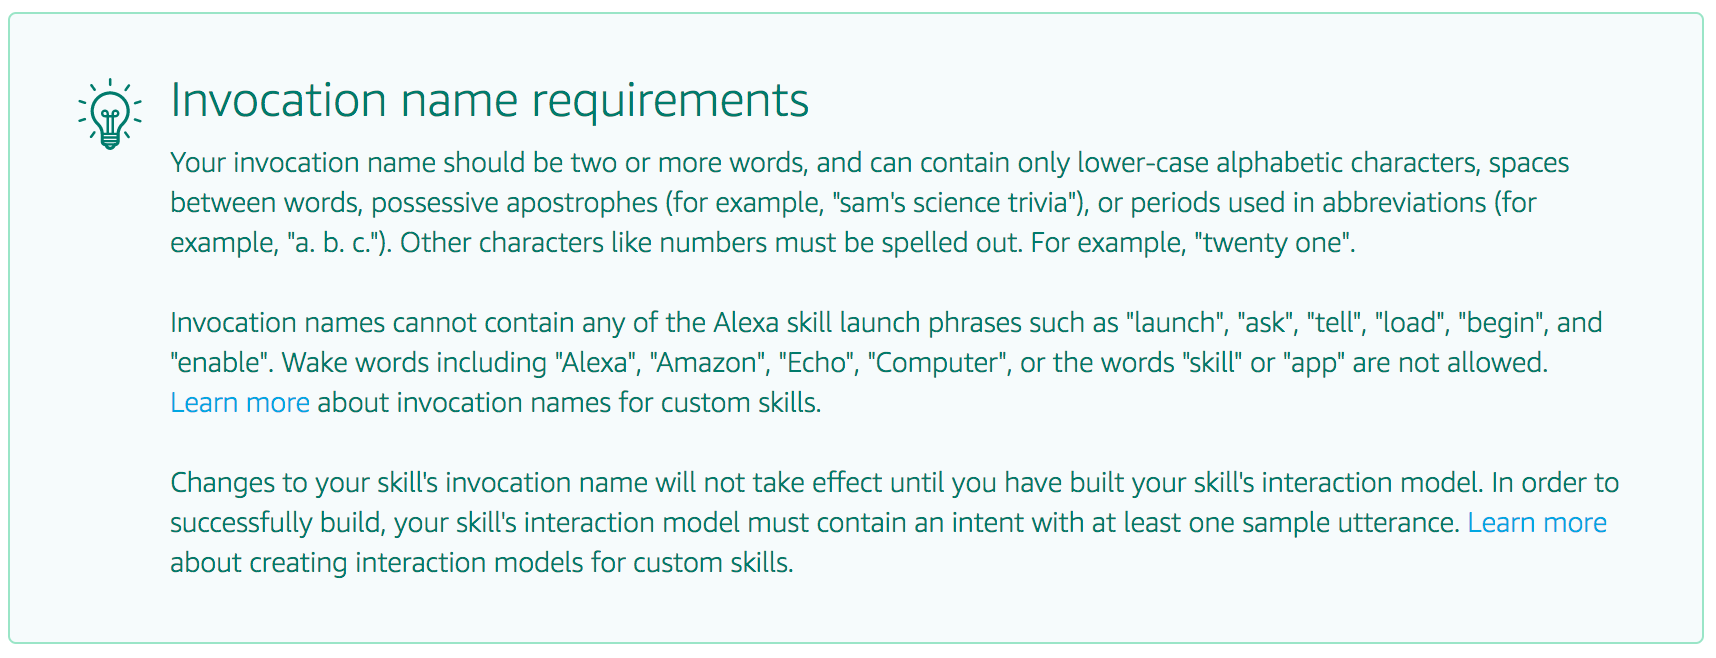
The first issue I came across is the skill invocation name. I wanted to just use stackery but there is a very large dialog box that lists requirements, and at the top of that list is that the invocation name should be two or more words. That seemed increadibly unwieldy and I wasn't sure what I'd go with.
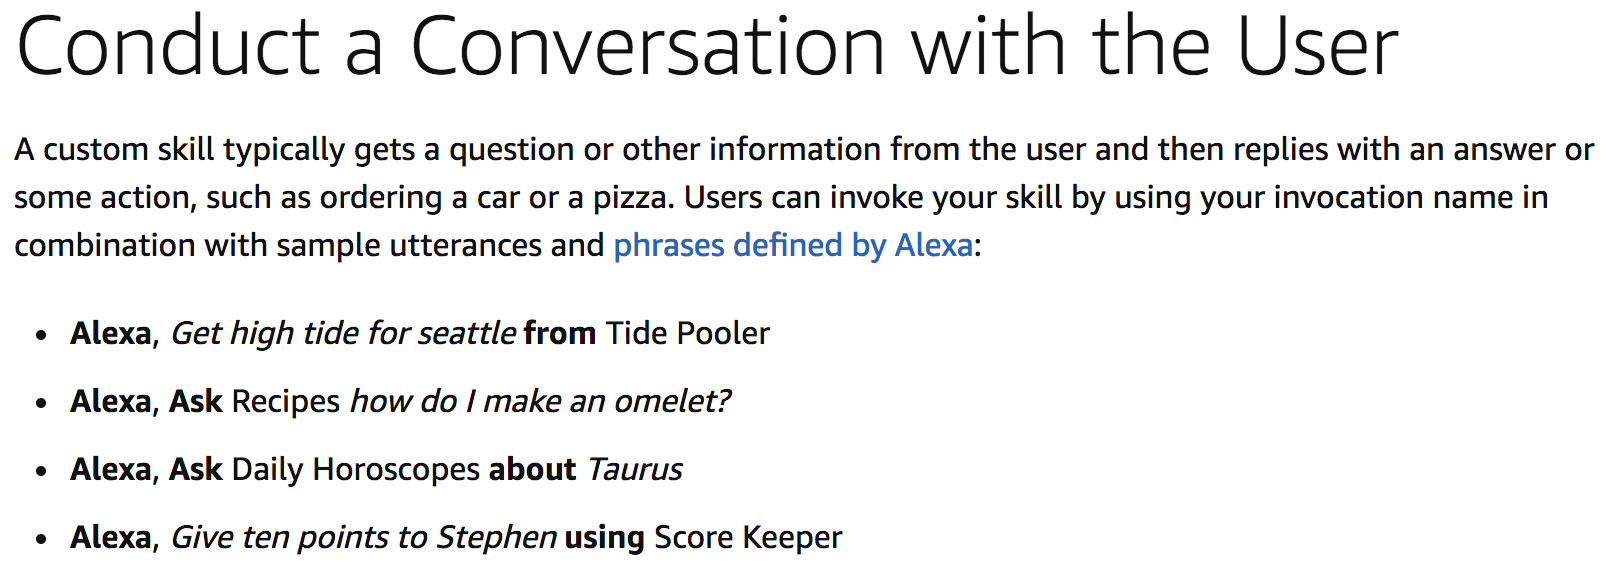
 This requirement also seemed to go against some of the examples I'd seen in some of Amazon's own guides:
 I decided that I really did want
 stackery as my invocation and I got lucky when I tried it - turns out that Amazon's definition of requirement here is synonomous with guideline.
I then created a new intent that I called deployIntent and populated the sample utterences with a couple of phrases:
deploy
deploy {stackName}
deploy {stackName} to {env}
Where {stackName} and {env} are slots that I was able to dive into their Edit Dialog settings to tell Alexa that both slots are required and how to prompt for them if the user doesn't provided it.
I got to say, the Alexa Skills UI/UX was really making this easy for me as a first time developer. It felt slick.
With this, I was pretty much done creating the skill, and now I needed to create the handler that would actually do the deployment.
Creating the Alexa Skill Handler
I created a new stack in Stackery called alexaDeployments. As an Alexa skill can directly invoke an AWS Lambda function, I deleted all of the existing resources and started with a fresh function which I called alexaHandler. I updated the timeout to be 300 seconds. Note that deployments can easily take more than 5 minutes. To really be robust, the stack deployment should be handled by Docker Task resource instead, but since this was just a POC, I was willing to accept this limitation to speed things up.
I then saved the stack in the UI and cloned the repo locally to start developing the handler. Following the second guide quickly gave me the skeleton of my alexaHandler lambda function. It's a lot of relatively repetitive code, thats well outlined in the guide, so I'm not going to add it here. What I needed to do now was code my DeployIntentHandler and add the stackery CLI to the function.
When Stackery packages a function to Lambda, it includes everything in the function directory, so taking advantage of that, I downloaded the Linux variant of the Stackery CLI into the /Stackery/functions/alexaHanlder folder in my repo. The Stackery CLI requires a few steps to be able to deploy:
- A
.stackery.tomlfile that is created by running through thestackery logincommand - AWS credentials provided either via the command line (
--access-key-idand--secret-access-key) or via a profile in the~/.aws/credentialsfile
To make things easier, I took my .stackery.toml file and added that to the function folder so I could skip the stackery login step on each invocation. As for my AWS Credentials, I will get them from environment variables set via Stackery's Environment Configurations.
With that, my DeployIntentHandler looked like this
const DeployIntentHandler = {
  canHandle (handlerInput) {
    return handlerInput.requestEnvelope.request.type === 'IntentRequest'
      && handlerInput.requestEnvelope.request.intent.name === 'DeployIntent';
  },
  handle (handlerInput) {
    console.log('DeployIntent Invoked');
    console.dir(handlerInput);

    const request = handlerInput.requestEnvelope.request;

    if (request.dialogState !== 'COMPLETED') {
      return {
        directives: [{"type": "Dialog.Delegate"}]
      };
    }

    const stackName = request.intent.slots.stackName.value;
    const env = request.intent.slots.env.value;

    let args = ['deploy', stackName, env, 'master',
                '--config', './.stackery.toml',
                '--access-key-id', process.env.accessKeyId,
                '--secret-access-key', process.env.secretAccessKey];

    return childProcess.execFile('./stackery', args)
      .then(result => {
        console.log(`stackery returned: stdout: ${result.stdout}`);
        console.log(`stackery returned: stderr: ${result.stderr}`);
      })
      .catch(error => {
        console.log(`ChildProcess errored with ${JSON.stringify(error)}`);
        if (error.stdout) {
          console.log(error.stdout);
          console.log(error.stderr);
        }
      })
      .then(() => {
        const speechText = `Starting deployment of ${stackName} into ${env}`;

        return handlerInput.responseBuilder
          .speak(speechText)
          .getResponse();
      })
  }
};
I committed my changes and deployed my alexaDeployments stack. Once deployed, I was able to go into the Deployed Stack Dashboard and click on the alexaHandler resource to get the Lambda ARN, which let me finish the last step in setting up my Alexa Skill - connecting the Alexa Skill to the Lambda function.
Function Permission Errors
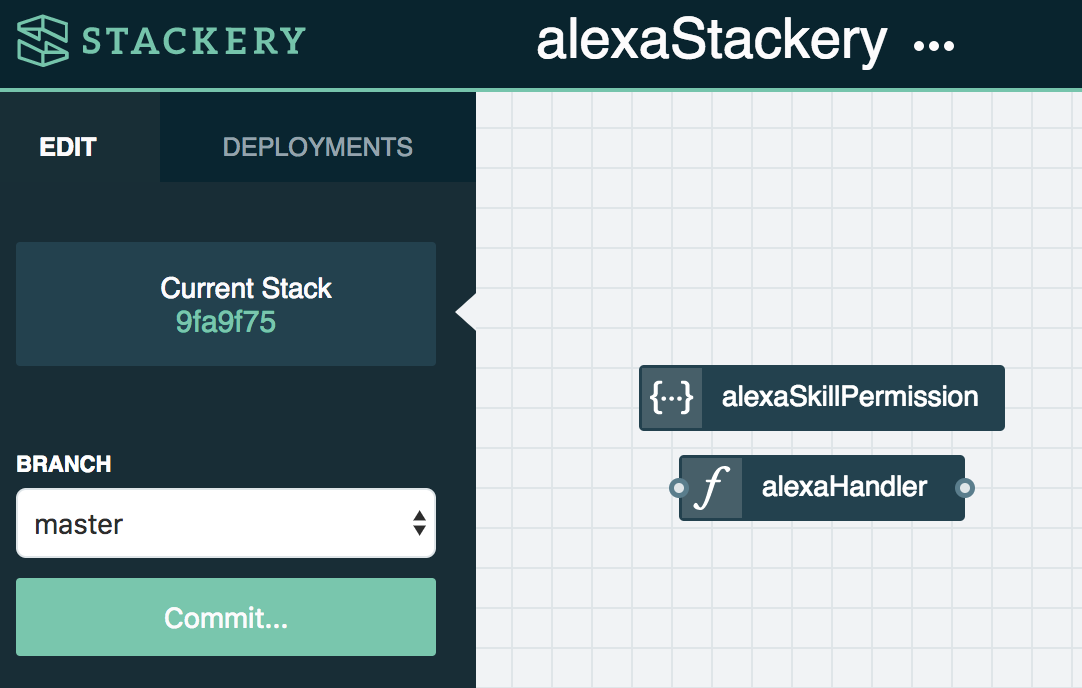
However, when I tried to add the ARN of the Lambda function to the Alexa skill, I got an error The trigger setting for the Lambda arn:aws:lambda:us-west-2:<account>:function:<functionName> is invalid. Error code: SkillManifestError - Friday, Apr 27, 2018, 1:43 PM. Whoops, I forgot to give Alexa permission to access the lambda function. Stackery usually takes care of all the permissions needed, but since it didn't know about the Alexa Skill, I was going to have to manually add the needed permission. Luckily, Stackery makes this easy with Custom CloudFormation Resources. I added a custom resource to my stack with the following CloudFormation:
{
  "Resources": {
    "alexaSkillPolicy": {
      "Type": "AWS::Lambda::Permission",
      "Properties": {
        "Action": "lambda:InvokeFunction",
        "FunctionName": "stackery-85928785027043-development-33181332-alexaHandler",
        "Principal": "alexa-appkit.amazon.com"
      }
    }
  }
}
 This let's alexa-appkit.amazon.com invoke my function. After re-deploying my stack with this change, I was able to finish linking my Alexa Skill to my handler, and it was time to test!
Timeouts and Retry Errors
Initial testing looked good - Alexa was able to run my skill, my handler was getting invoked, and I could see my test stack (a simple hello world stack) was getting re-deployed. However, when I looked into the CloudWatch logs for my alexaHandler function, I noticed that I was getting the errors printed from the Stackery CLI Failed to prepare deployment: \nStackery API responded with status code: 409\nYou probably already have a deployment in progress\n. With some inspection, I realized that since the handler took the time to actually deploy before responding to Alexa, Alexa was seemingly timing out and retrying in about 30 seconds. So this error was from the re-invocation of the Stackery CLI.
Ideally, I'd be able to provide intermittent status updates via Alexa, but unfortunately you are only allowed to respond once. To handle this issue, I refactored my alexaHandler function to asynchronously invoke another lambda function stackeryWrapper.
So now, my DeployIntentHandler looked like this:
const DeployIntentHandler = {
  canHandle (handlerInput) {
    return handlerInput.requestEnvelope.request.type === 'IntentRequest'
      && handlerInput.requestEnvelope.request.intent.name === 'DeployIntent';
  },
  handle (handlerInput) {
    console.log('DeployIntent Invoked');
    console.dir(handlerInput);

    const request = handlerInput.requestEnvelope.request;

    if (request.dialogState !== 'COMPLETED') {
      return {
        directives: [{ "type": "Dialog.Delegate" }]
      };
    }

    const stackName = request.intent.slots.stackName.value.replace(' ', '');
    const env = request.intent.slots.env.value.replace(' ', '');
    let message = { stackName, env };
    const Payload = JSON.stringify(message, null, 2);

    return lambda.invoke({
      FunctionName: stackeryWrapper.functionName,
      InvocationType: 'Event',
      Payload
    }).promise()
      .then(() => {
        const speechText = `Starting deployment of ${stackName} into ${env}!`;

        return handlerInput.responseBuilder
          .speak(speechText)
          .getResponse();
      })
  }
};
And my new stackeryWrapper function looks like this:
const childProcess = require('child-process-promise');

module.exports = async message => {
  console.dir(message);

  const stackName = message.stackName;
  const env = message.env;

  return childProcess.execFile('./stackery', ['deploy', stackName, env, 'master', '--config', './.stackery.toml', '--access-key-id', process.env.accessKeyId, '--secret-access-key', process.env.secretAccessKey])
    .then(result => {
      console.log(`stackery returned: stdout: ${result.stdout}`);
      console.log(`stackery returned: stderr: ${result.stderr}`);
    })
    .catch(error => {
      console.log(`ChildProcess errored with ${error}`);
      if (error.stdout) {
        console.log(error.stdout);
        console.log(error.stderr);
      }
    });
}
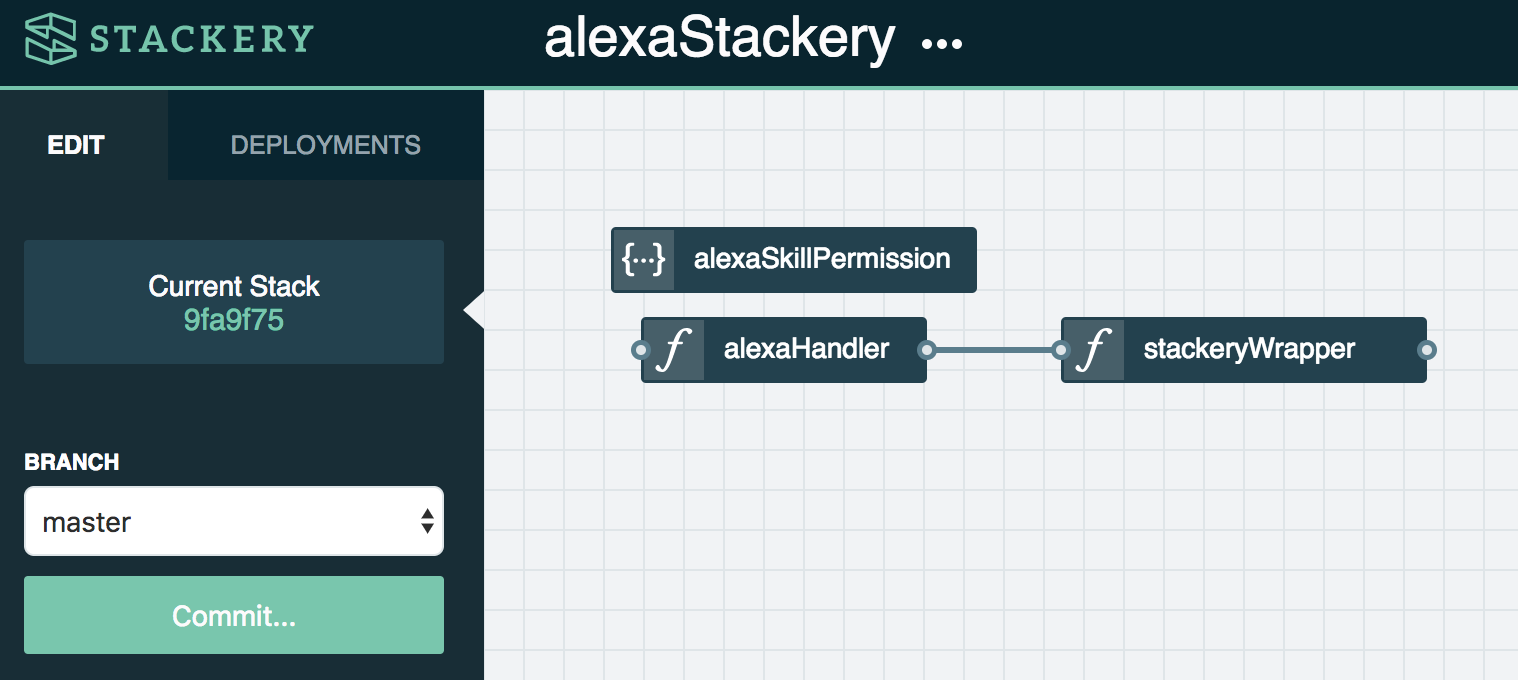
And my stack looks like this:
Final Thoughts
While this project is far from being useable by anyone else as it stands, I found it interesting and honestly exciting to be able to get Stackery deployment to work via Alexa. Ramping on Alexa was relatively painless, although Amazon does have some contradictory documentation that can confuse the waters. And with Stackery, it was painless to handle adding the CLI and the refactoring that I needed. There's a lot that could still be done to this project such as authorization, authentication, status updates, etc, but that will have to wait for another day.
Related posts