Alexa, How Can I Get AWS Credits?
Answer: By deploying an Alexa Skill with Stackery

We are excited to announce that if you deploy our AWS Trivia Alexa Skill from Stackery we will send you AWS Credits ($50 value)!
Details
- Build an Alexa Skill (tutorial below) using Stackery to deploy into your AWS account.
- You can deploy the code as-is out of Stackery, or modify the content of the quiz.
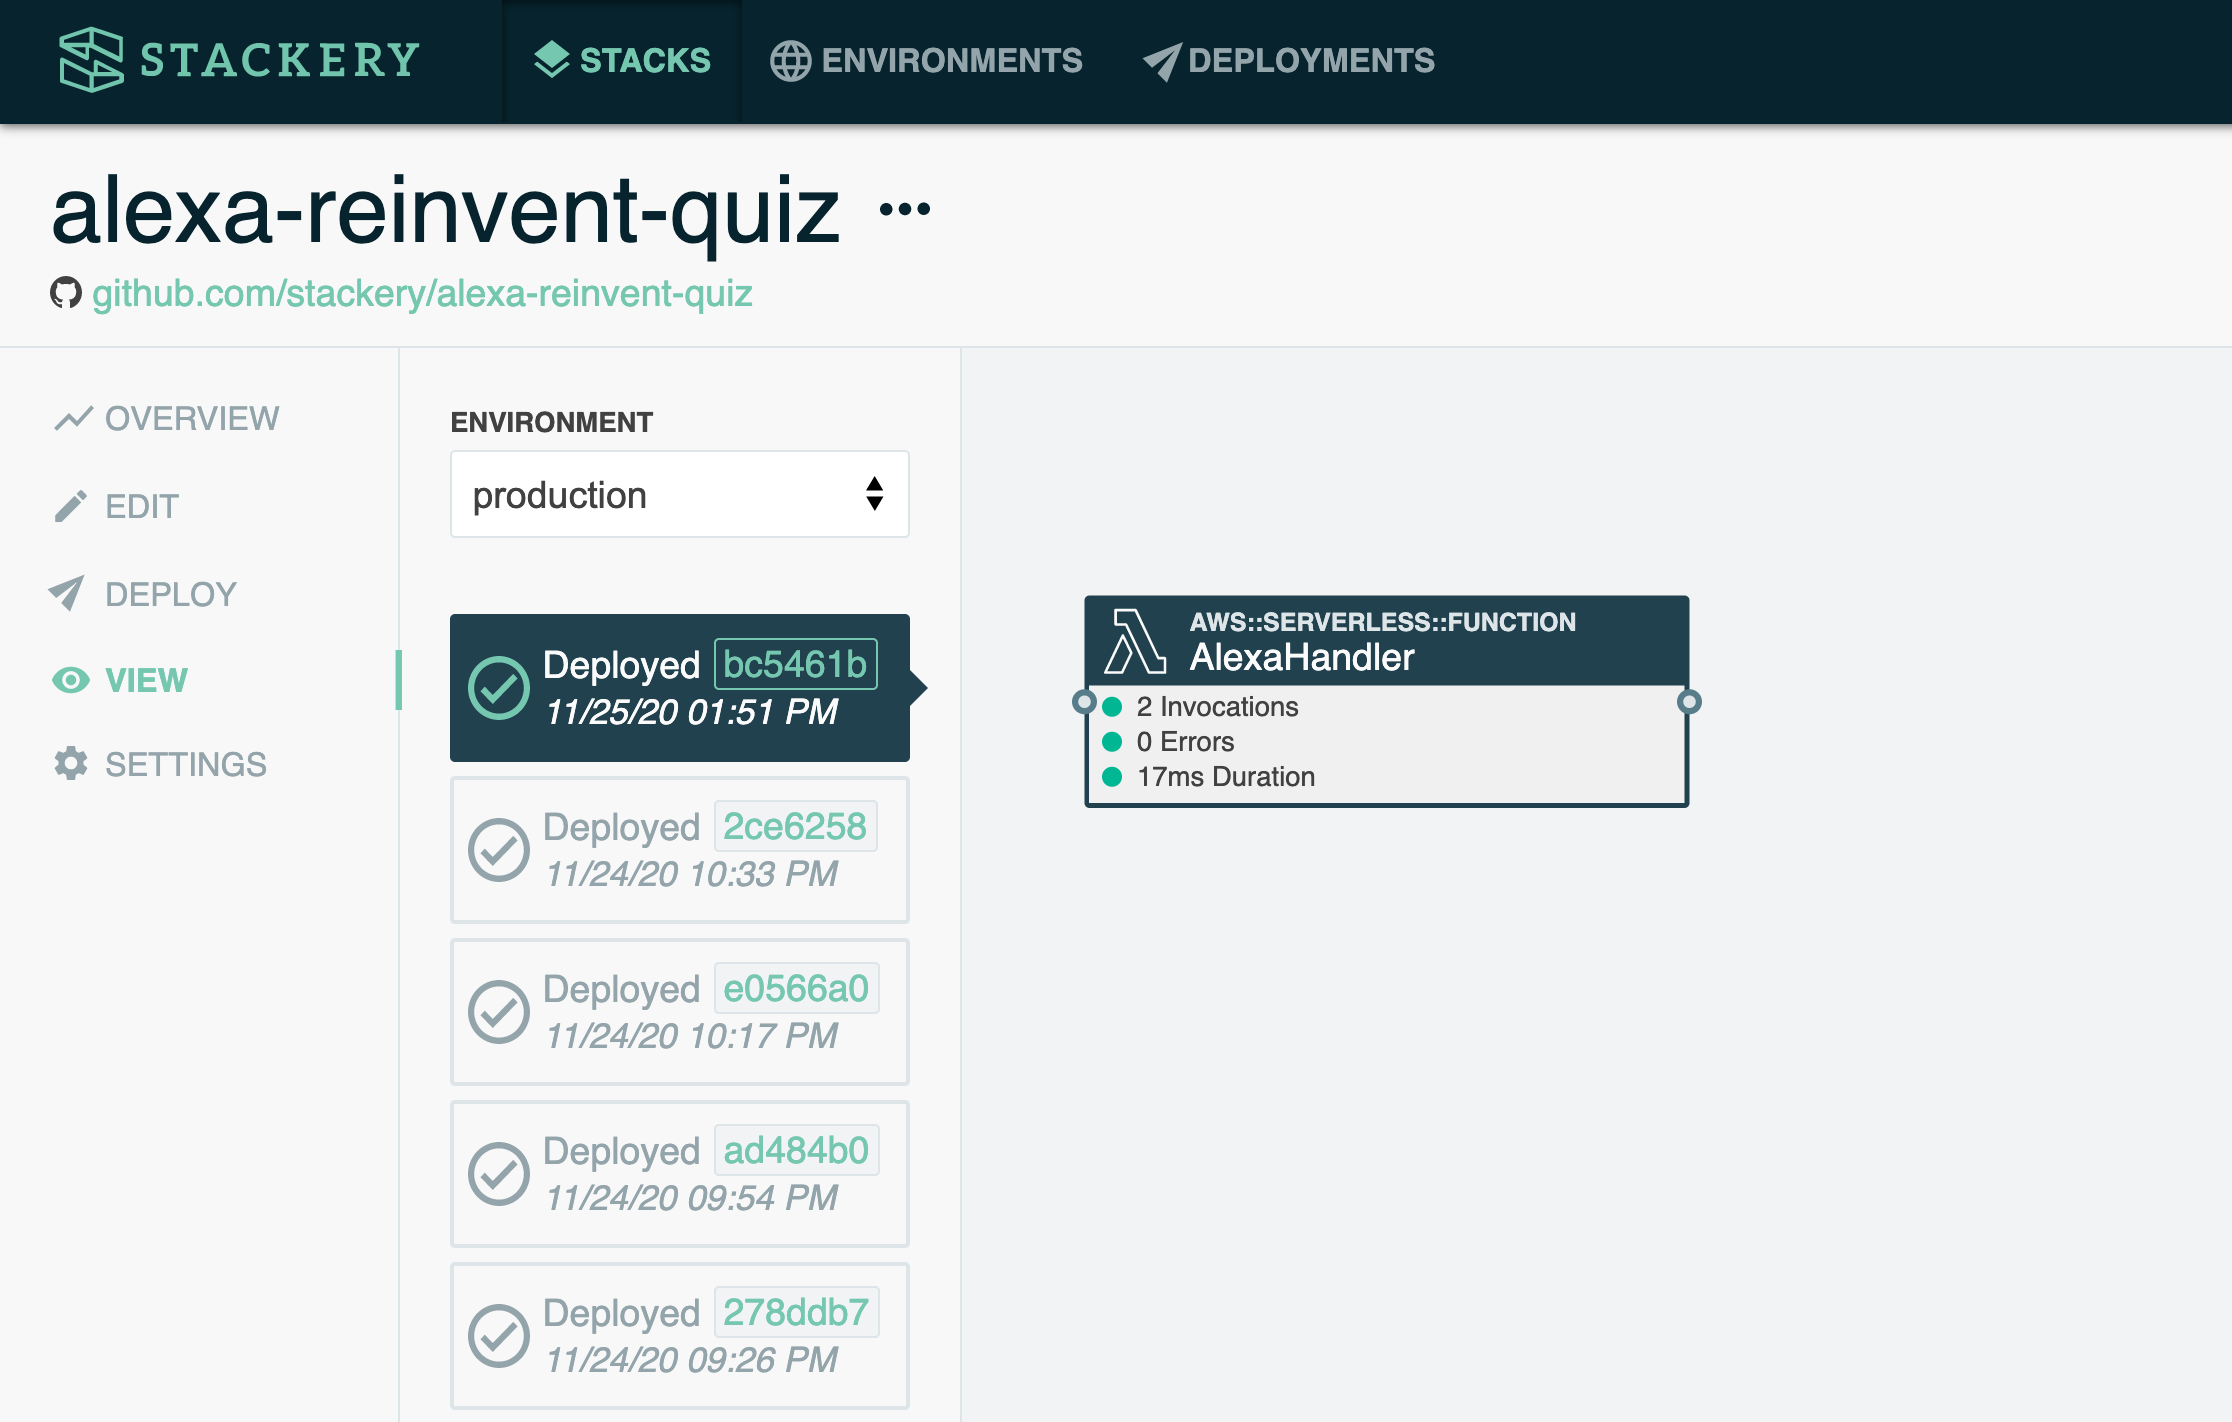
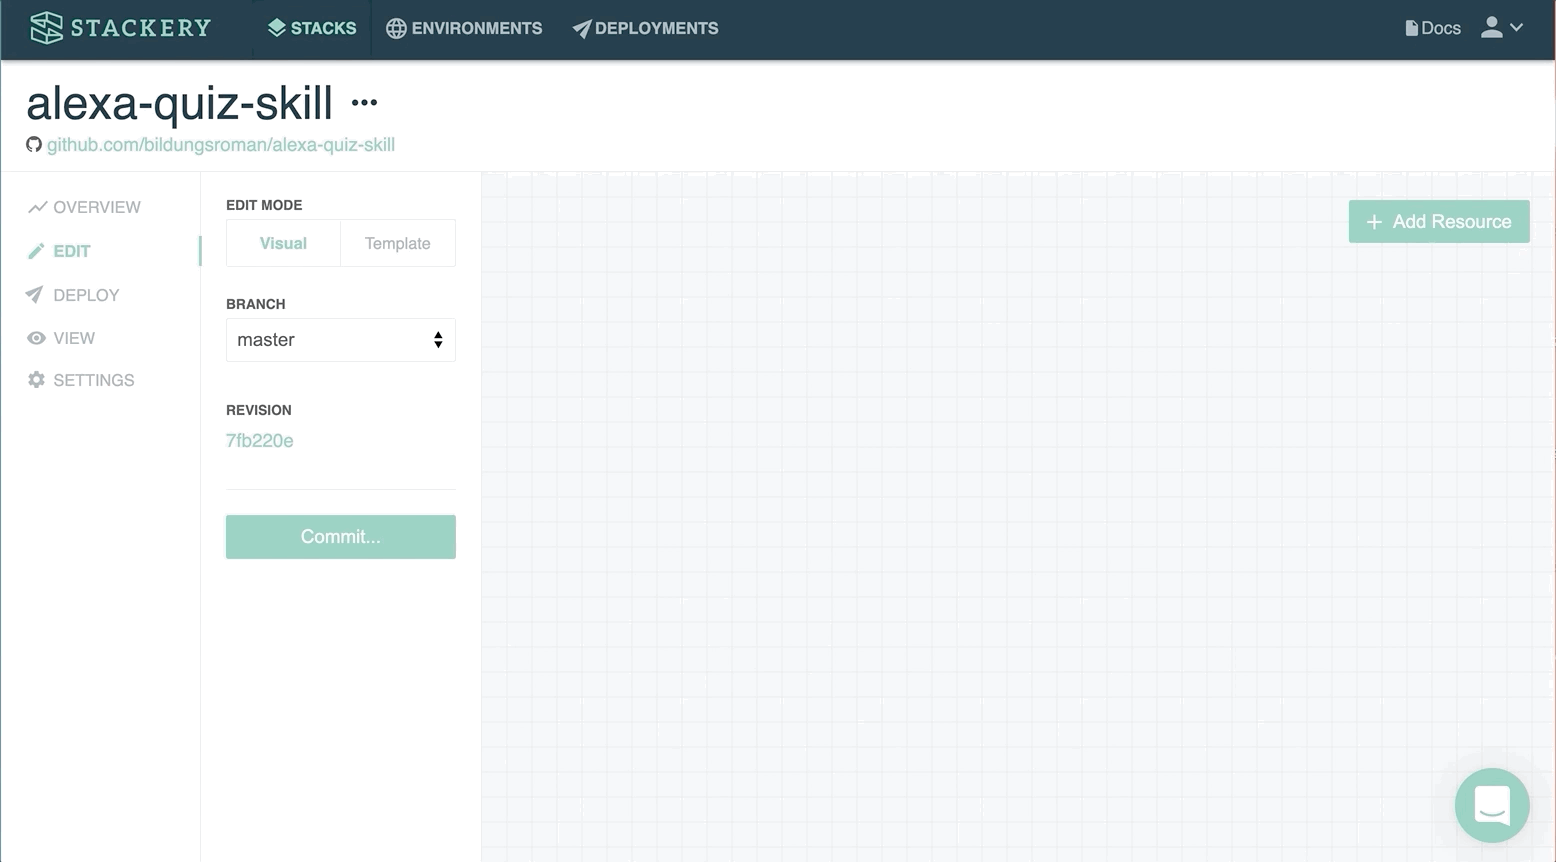
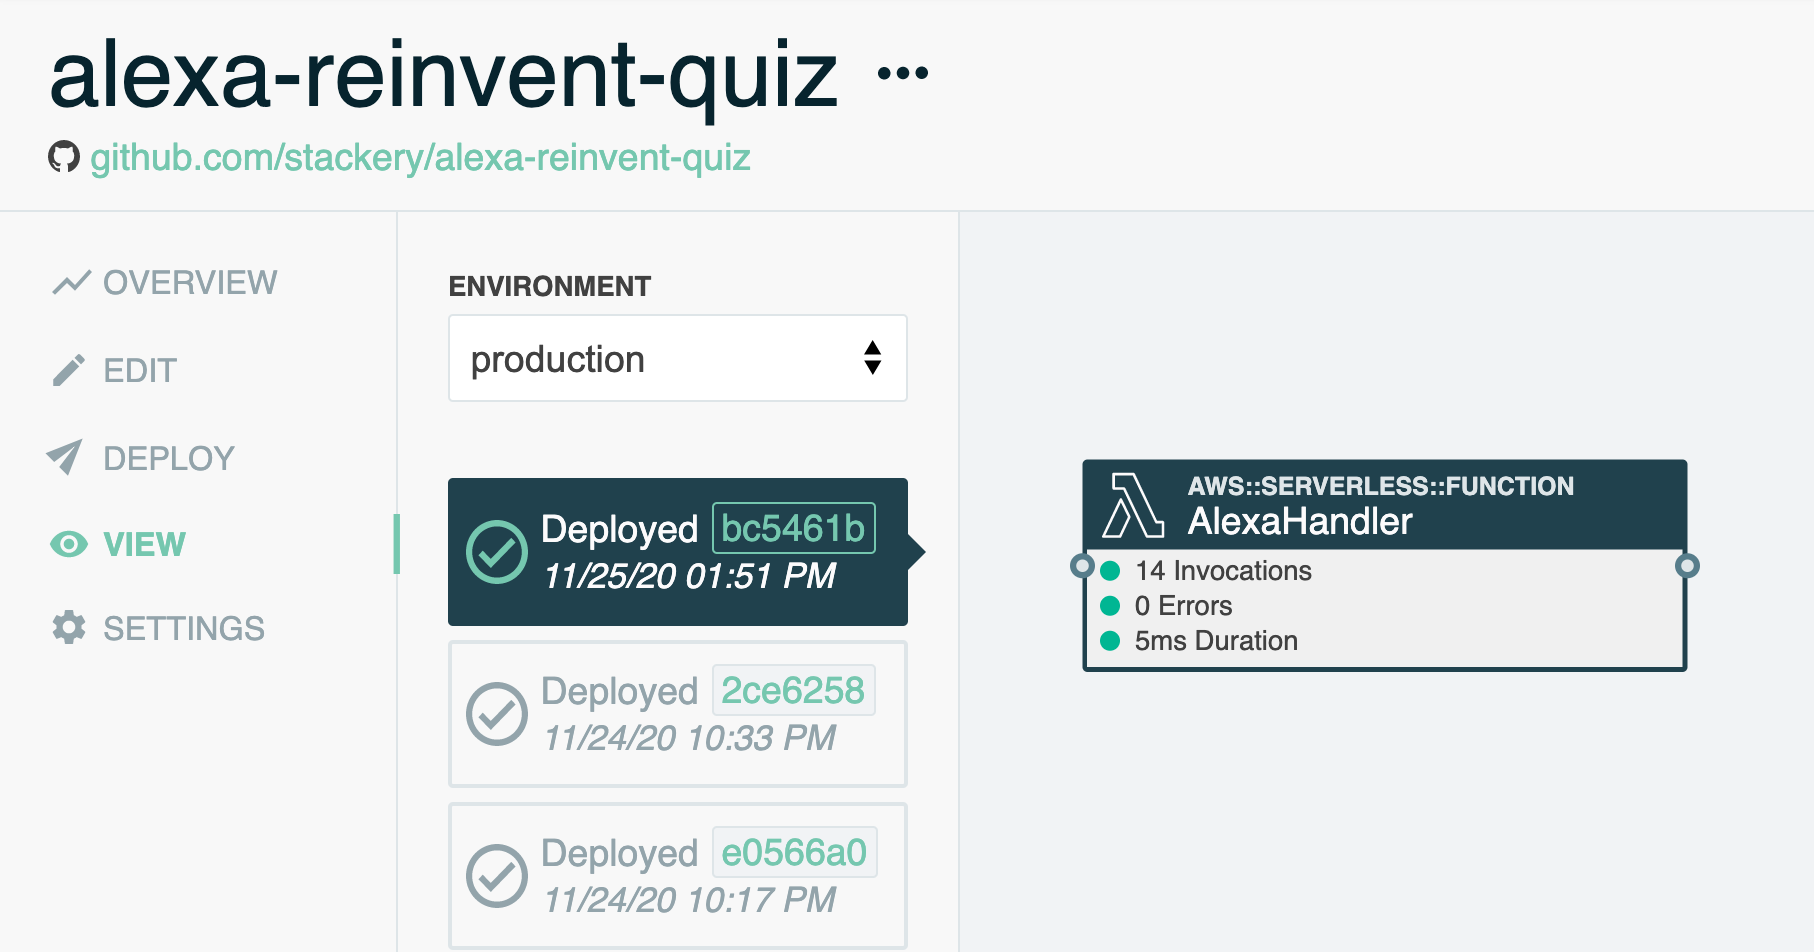
- Tweet us a screenshot of your deployed backend. It'll look something like this:
Oh, and bonus points for playing the quiz game - find it here: Stackery re:Invent Quiz Alexa Skill.
Q&A
What is an Alexa Skill?
A Skill is a voice app that can be opened on an Alexa-enabled device, such as a smart speaker, a smart home device that's Alexa-enabled, a smartwatch.
What does this Skill do?
This Skill asks users questions about AWS services, such as Lambda, Cognito or EC2, in a 10-question quiz game. It also gives users facts about certain AWS services.
Do I need to be an AWS expert to follow this tutorial?
Nope! Stackery makes it easy for anyone to deploy serverless apps on AWS, and adding infrastructure is as simple as dragging and dropping! You just need an AWS account, a modern browser, and a computer connected to the Internet.
Do I need a lot of programming experience to follow this tutorial?
No! If you can copy-paste, you can build and deploy this app. If you want to customize the quiz, you will need to know basic JavaScript.
Do I need an Alexa-enabled device to test my Skill?
No. The Alexa developer console includes an in-browser Alexa simulator for testing.
What does it cost?
Everything should fit easily within AWS's free tier, and the AWS account and Amazon Developer account are free.
Can I make Alexa speak in a sarcastic tone?
Sadly, no (believe me, I tried). But there are some cool things you can do with SSML, the markup language used to dictate how Alexa generates phrases.
Are there any terms and conditions you need to put in here?
Yup. Terms and conditions apply. While supplies last. Credit usages must follow AWS terms and conditions. Amazon Echoes based on availability. Shipping may be extra.
Resources
Tutorial
Prerequisites:
1. Create an Alexa Skill
- Log in to the Alexa Developer Console, and click the Create Skill button
- Name your skill whatever you'd like
- Choose Custom as your model
- Choose Provision your own as the method to host your skill's backend resources
- Scroll back up, make sure everything looks right, and click Create skill
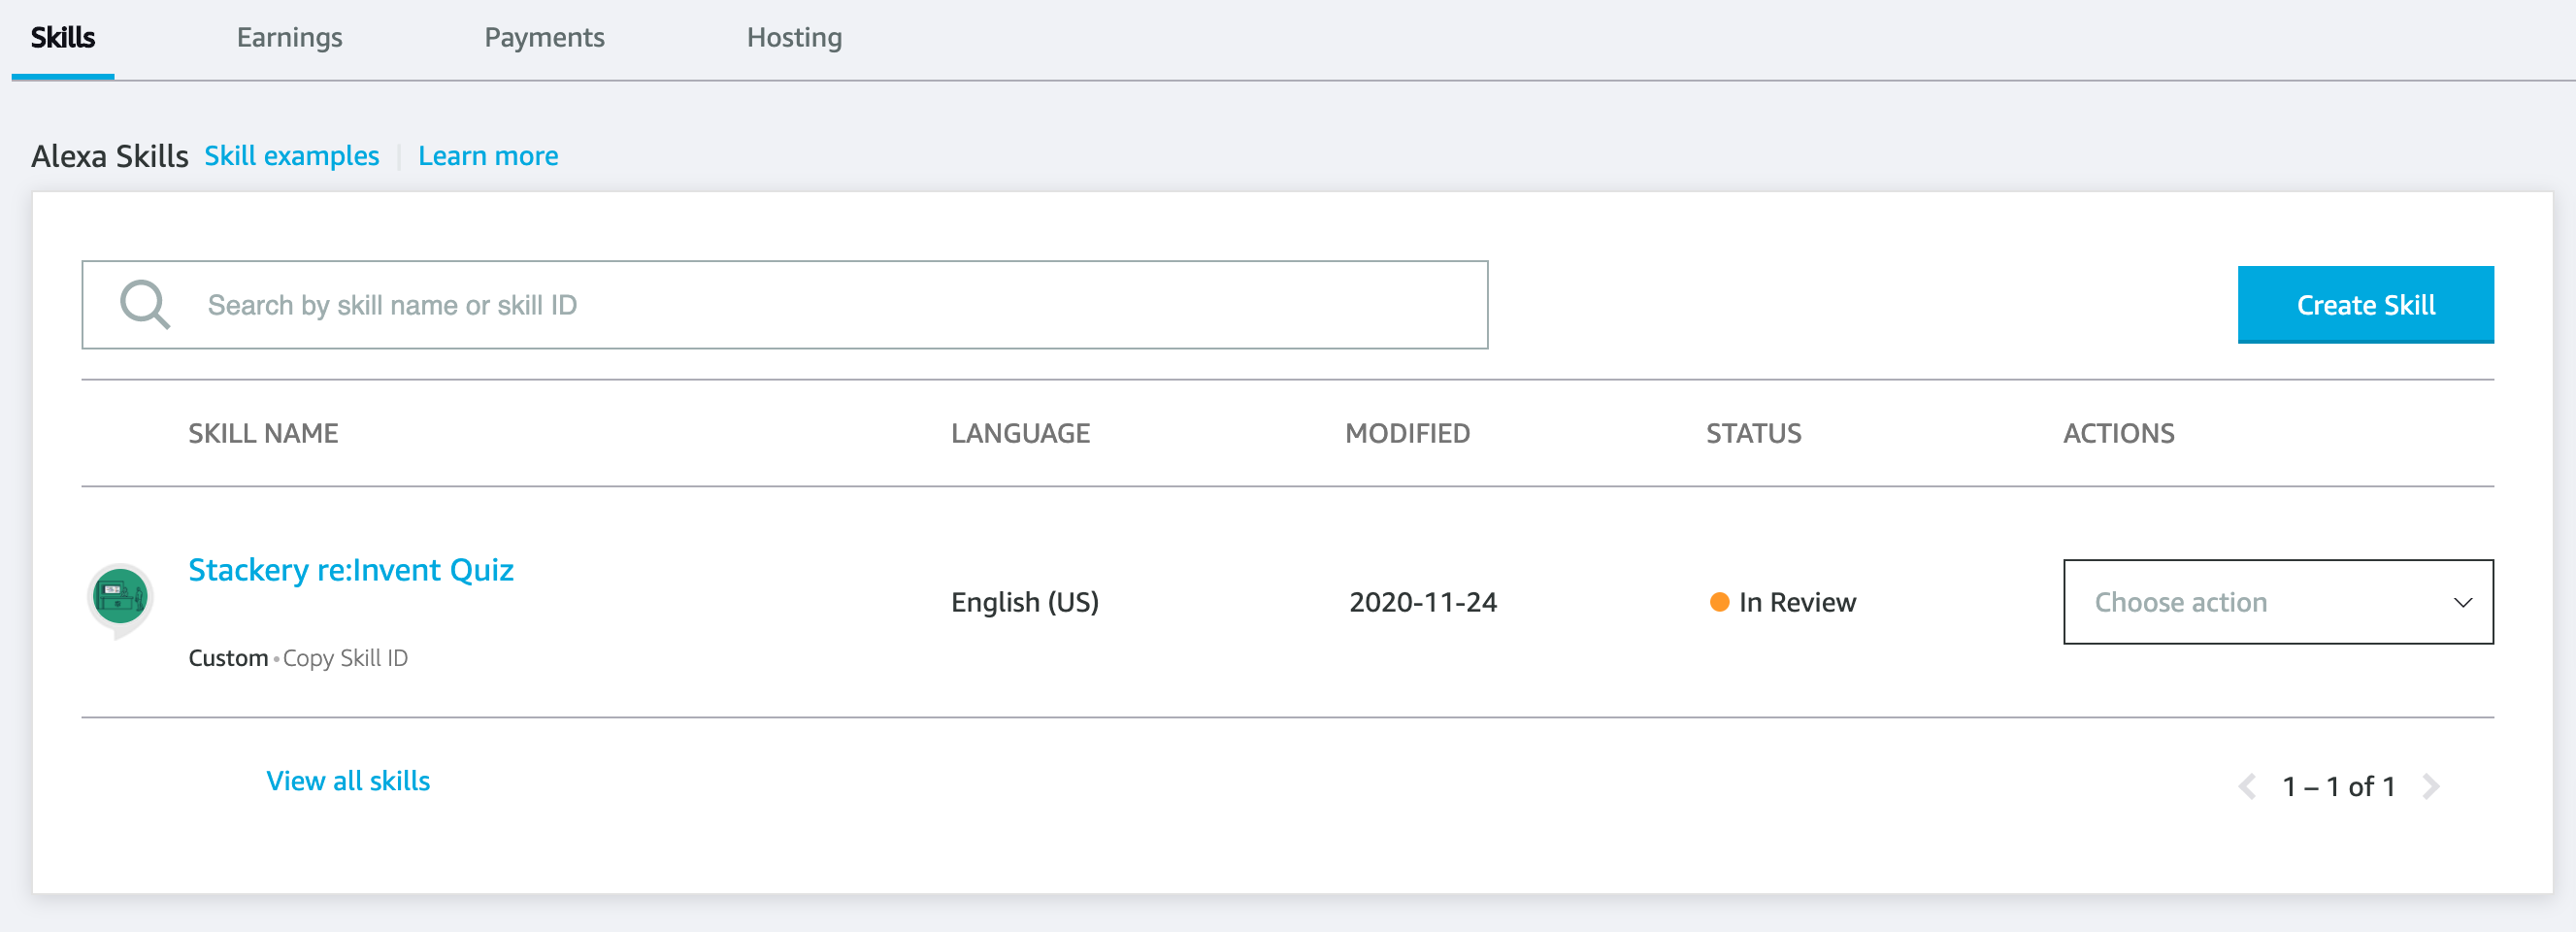
You'll now see your newly-created skill in a list of all skills:
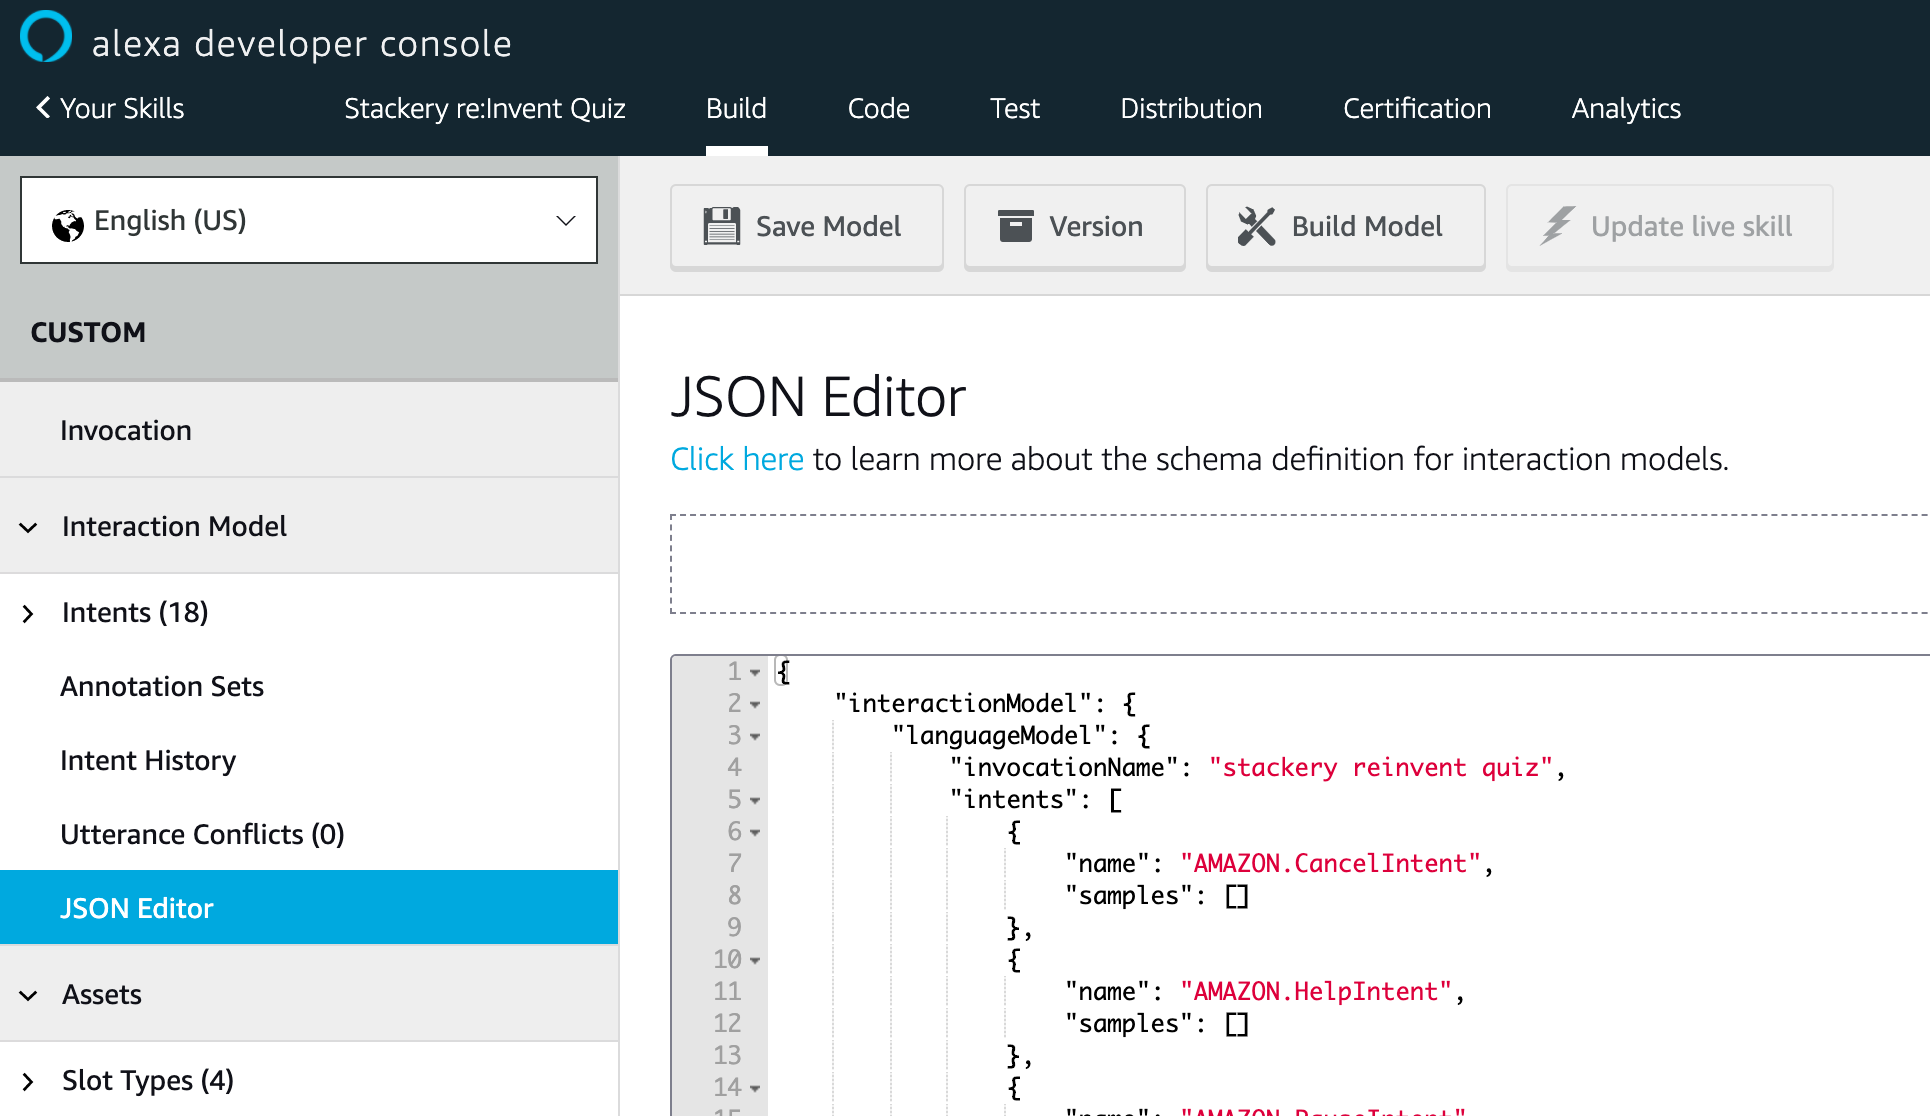
- Click on the skill name, and navigate to Interaction Model -> JSON editor
This is where you will paste a JSON file that describes the different forms of interactions your Skill will have with users, as well as the custom data that serves as the allowable answers to quiz questions.
- Copy the entire contents of this JSON file from our alexa-reinvent-quiz repo
- Paste the copied contents into the Alexa JSON editor, then click Save Model at the top, followed by Build Model
Once you save, you will see that your Intents were auto-populated. Feel free to poke around and view the sample utterances and slot types that are there now. When you're done, return to the main console where all of your skills are listed, as you'll need to get your Skill ID in a few moments, so be sure to leave this browser tab open.
2. Build your backend in Stackery
For this step you'll need a free Stackery account, a Git provider, and a code editor. If you're a first-time Stackery user, you'll need to link your Git provider and AWS account the first time you commit and deploy a stack. Don't worry, the process is fairly quick and simple and the app will walk you through it.
- In a new tab, log in to Stackery, and create a new stack with a new repo
- In the Visual edit mode, add a function and give it the name
AlexaHandlerand change its code source directory tosrc/AlexaHandler. Scroll down and hit Save
- Flip to the Template edit mode, and add the following YAML as part of the
Propertiesof yourAlexaHandlerfunction:Events: AlexaSkillEvent: Type: AlexaSkill SkillId: [your-skill-id] - Replace
[your-skill-id]with theSkill IDyou noted above1
This is what allows your Lambda function to be accessed by the specific skill you are building, and not any other.
Your template should look now something like this:
AWSTemplateFormatVersion: '2010-09-09'
Transform: AWS::Serverless-2016-10-31
Resources:
  AlexaHandler:
    Type: AWS::Serverless::Function
    Properties:
      FunctionName: !Sub ${AWS::StackName}-AlexaHandler
      ...
      Policies:
        - AWSXrayWriteOnlyAccess
      Events:
        AlexaSkillEvent:
          Type: AlexaSkill
          SkillId: amzn1.ask.skill.some-long-numbers-and-letters
Parameters:
  ...
If you want to double-check your formatting, you can refer to our SAM template in the tutorial repo.
- If everything looks right, click the Commit... button to commit your changes to your Git repository
- Follow the repo link below the stack name to access your newly-created repository

- Clone your repo to your computer and open it in your favorite (or least-favorite, we're not particular) IDE
3. Add function code
When you created a function in Stackery, it stubbed out some function code for you in the chosen runtime, which is Node 12 in this case. We're going to replace the function code with the Alexa backend from the tutorial repo, as well as its package.json contents to add the required dependencies.
- Open
your-repo/src/AlexaHandler/index.jsand replace its contents with the contents of Stackery's Alexa Skill code. Save the file - Open
your-repo/src/AlexaHandler/package.jsonand replace its contents with the following and save:
{
  "name": "alexahandler",
  "version": "1.0.0",
  "description": "",
  "main": "index.js",
  "author": "Stackery",
  "license": "MIT",
  "devDependencies": {
    "aws-sdk": "^2.796.0"
  },
  "dependencies": {
    "ask-sdk-core": "^2.9.0",
    "ask-sdk-model": "^1.34.1"
  }
}
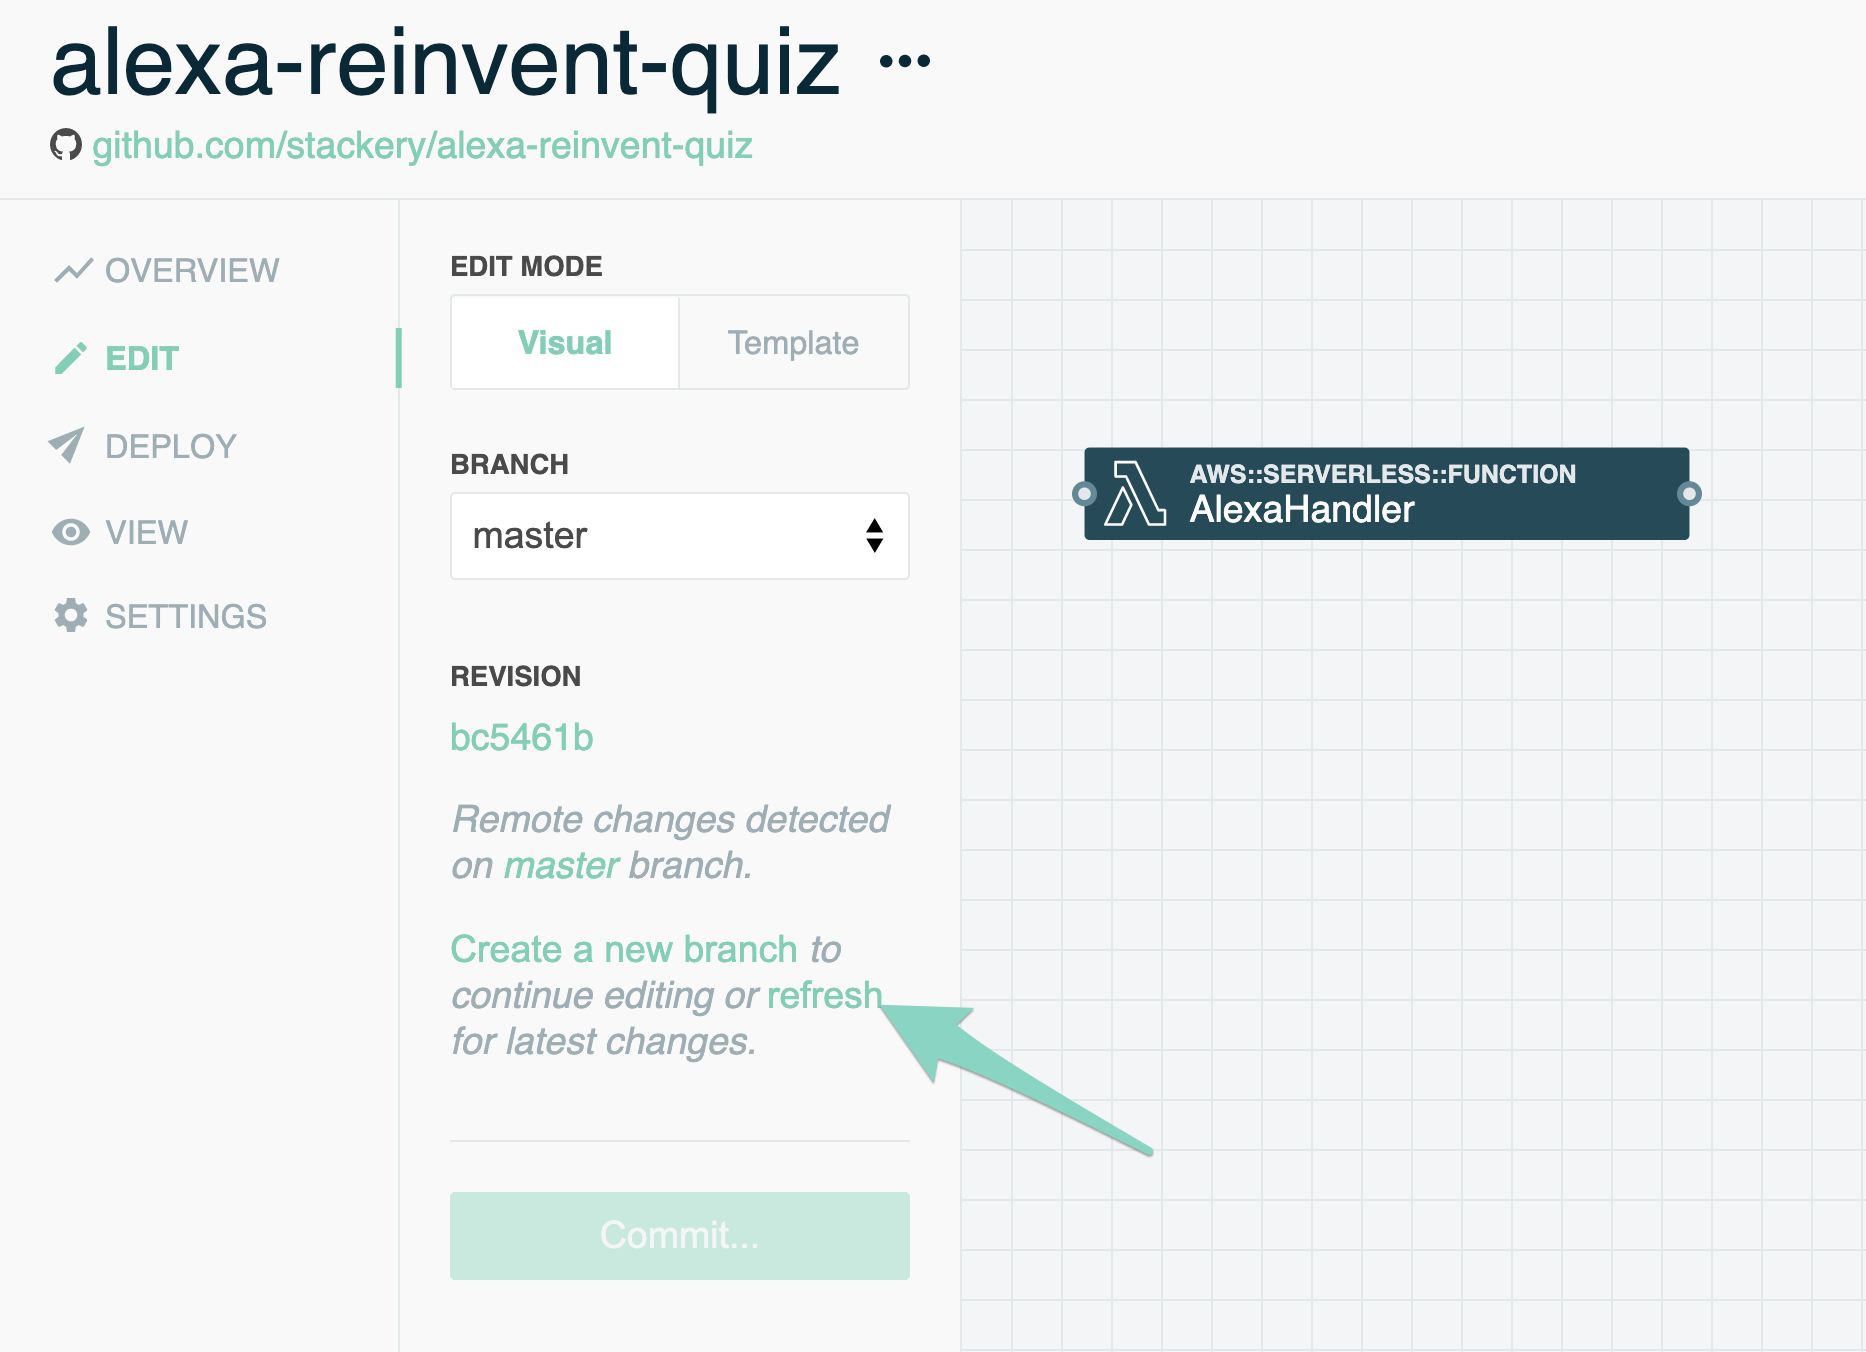
- Commit the changes and push to your Git repo
If you kept your Stackery tab open, you'll have noticed that it detected the changes you pushed up. Go ahead and hit the refresh link:
4. Deploy to AWS
- In the Stackery app, navigate to the Deploy tab
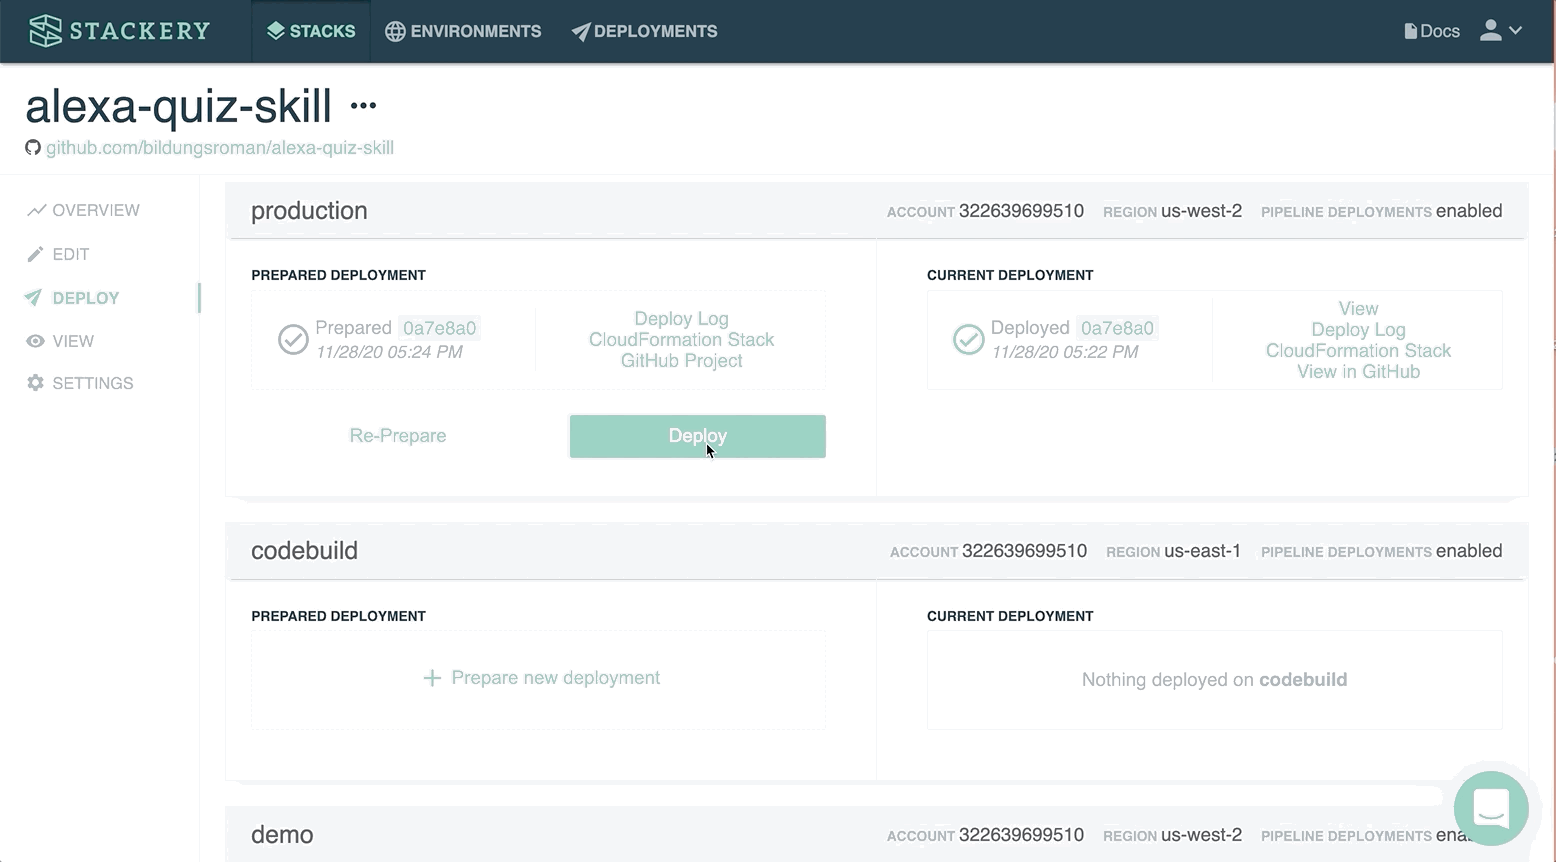
- Select an environment to deploy to (if this is your first time deploying with Stackery, you'll be guided through linking to AWS first). Click Prepare new deployment and then Prepare Deployment to start your deployment
- Once the deployment is prepared (which will take about a minute), click Deploy. A tab will open in your AWS Console, where you'll need to click Execute to kick off the deployment2
This will take a few minutes - get yourself a coffee and a pat on the back, because you're 90% done with deploying your first Alexa Skill!
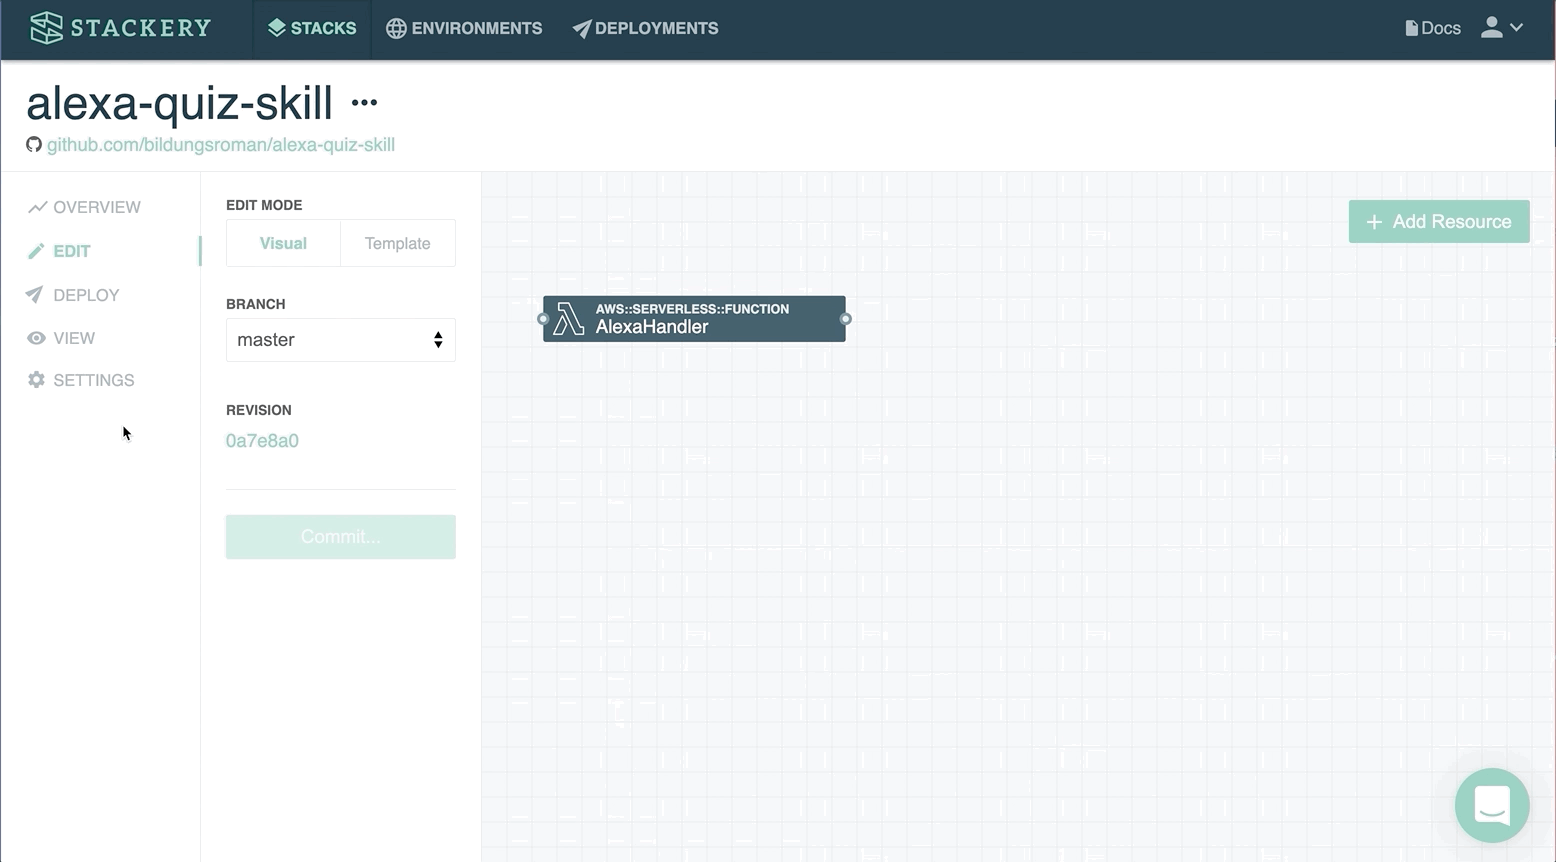
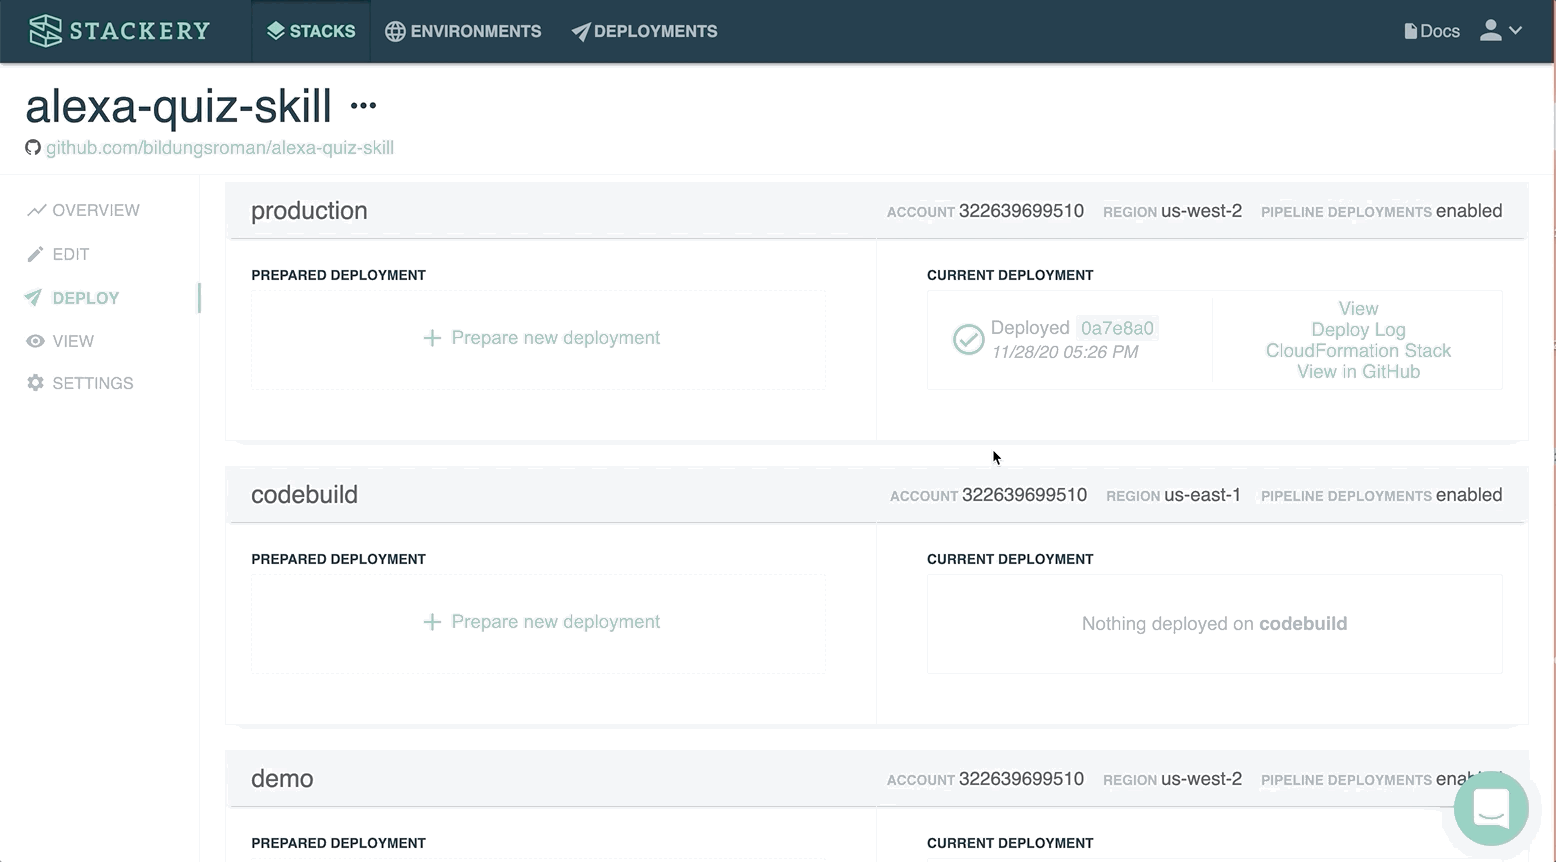
- You'll get a notification when your stack has deployed. Click the View tab to see your live stack
- Grab your screenshot for Twitter!
- Double-click the
AlexaHandlerfunction to pull up some handy data and links. - Copy the function's ARN, as you'll need it for the final step
5. Connect your backend to your Skill
This is it: the final stage, when we connect all the dots and test our Alexa Skill!
- Back in the Amazon Developer Console, select Endpoint from the menu
- Enter the ARN you copied in the previous step like so:
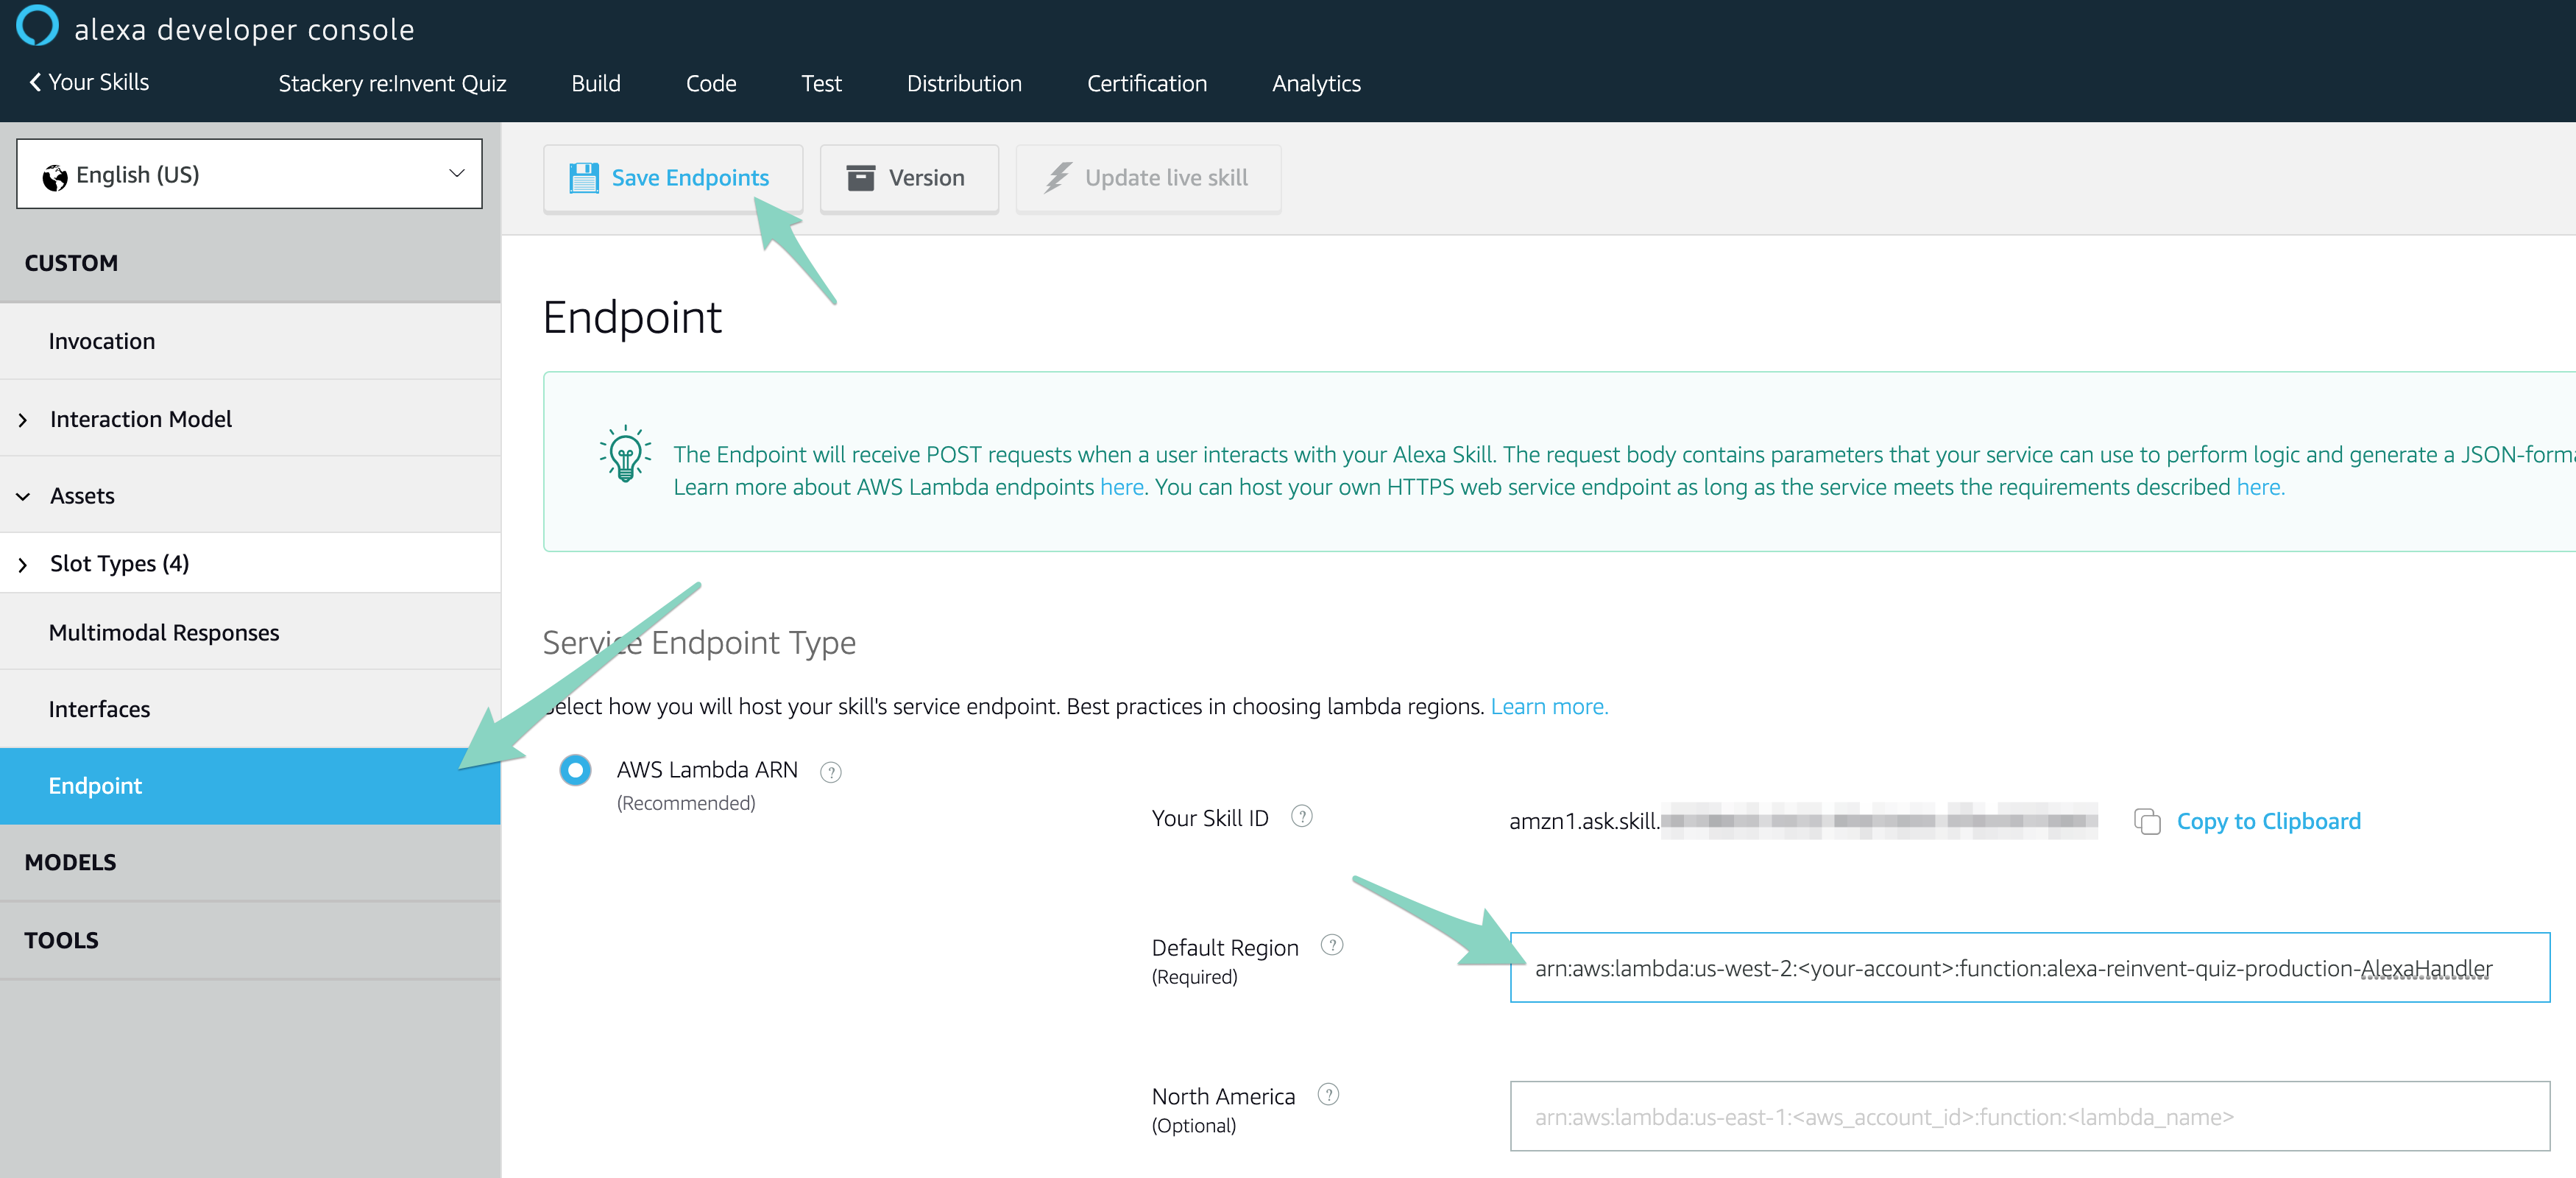
- Click Save Endpoints
- In the side tab, return to Invocation and click Save Model, then Build Model
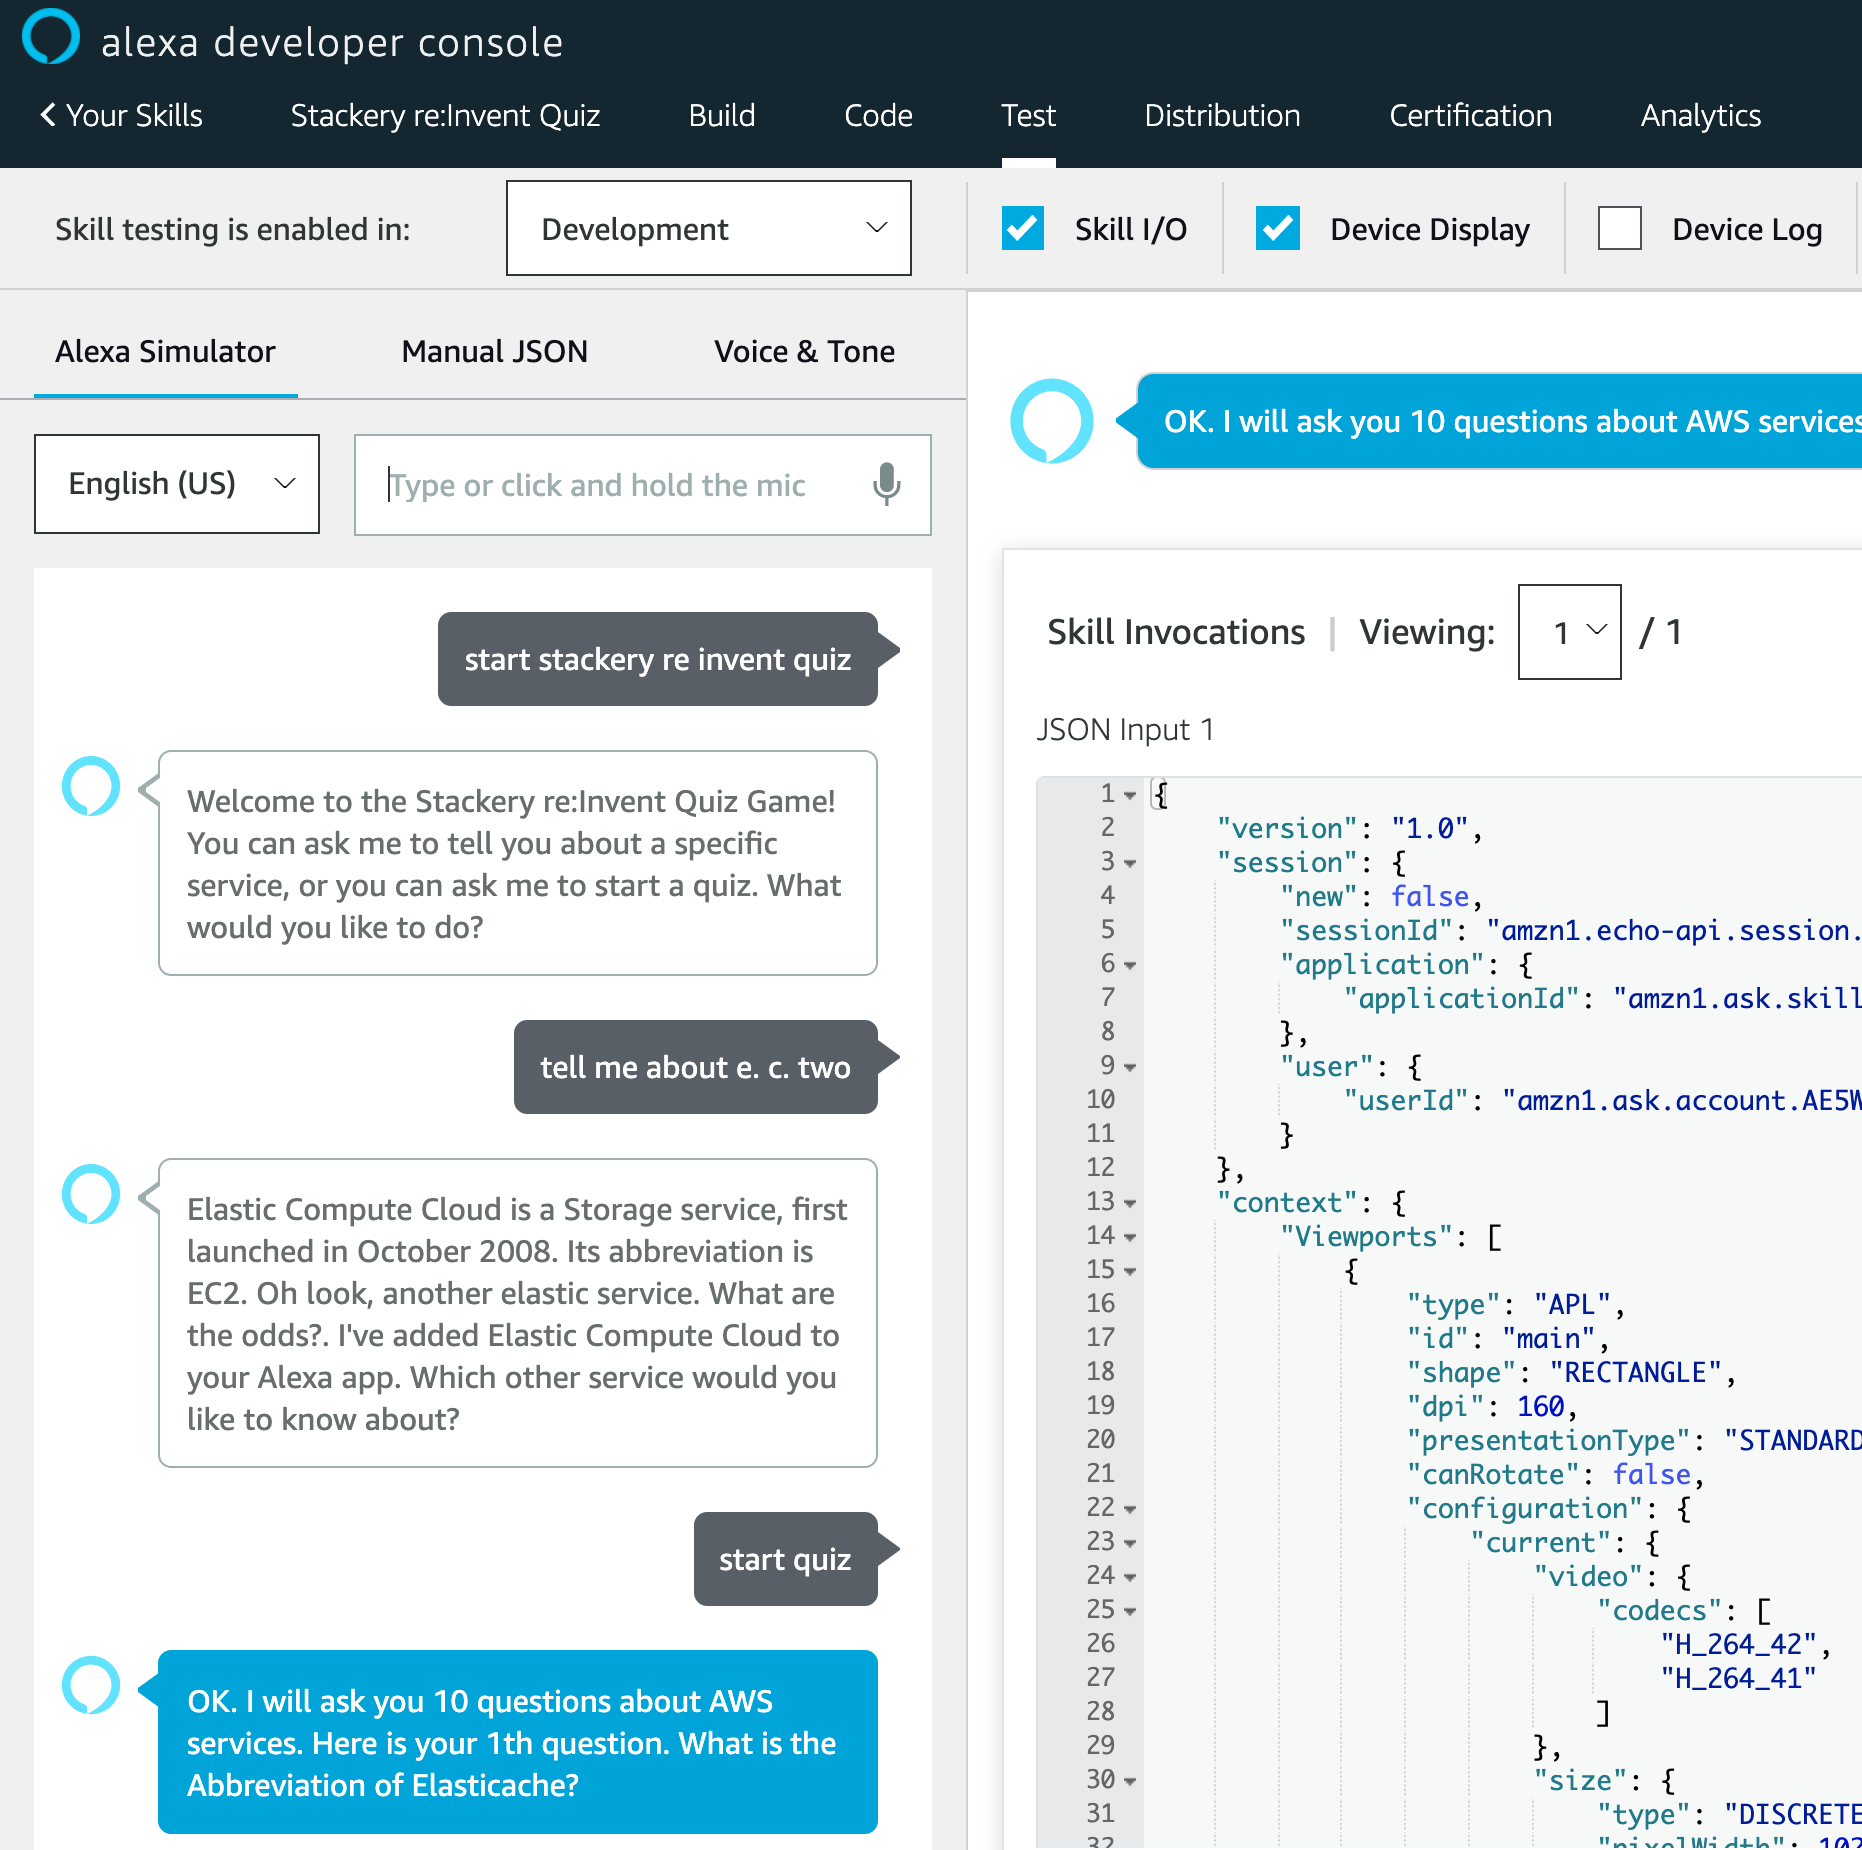
Now you're ready to test your Skill! Navigate to Test, and say or type "Start Stackery re:Invent Quiz" to kick off the quiz. You can try the quiz yourself, or get some trivia information about specific AWS services. Knock yourself out - this is the fun part!
Return to the Stackery Dashboard, notice that your function was successfully invoked while you were testing!
Next steps
Hopefully, this tutorial piqued your interests in building Alexa Skills. With a Lambda backend, you can build skills in just about any runtime, and Stackery helps you deploy changes quickly (and automatically with our Deployment Pipelines).
I'd love to see what you build - feel free to send your projects my way on Twitter, and don't forget to send your deployed stack to Stackery on Twitter.
1 For the sake of this tutorial, we are hard-coding the Skill ID. If you are saving your Skill ID directly in the template, make sure your repo is private. Alternatively, you can use Stackery's Environments and Parameter Store to follow best practices and store your Skill ID as in AWS's Systems Manager Parameter Store and reference it at build time.
2 This tutorial walks you through deploying manually in the browser, but there are other ways to deploy that will likely suit your workflow better. You can deploy with the Stackery CLI with just one command, or completely automate this process upon a merge to the repo's main branch, including automated test runs, with Stackery's Deployment Pipelines.
Related posts
Use Machine Learning to detect objects in an image